How to take product photos with your phone (no studio needed)
Online shoppers cannot touch your product, so your photos do the selling. You do not need an expensive camera or studio. A window, a sheet of white poster board and your phone can produce clean, trustworthy product photos.
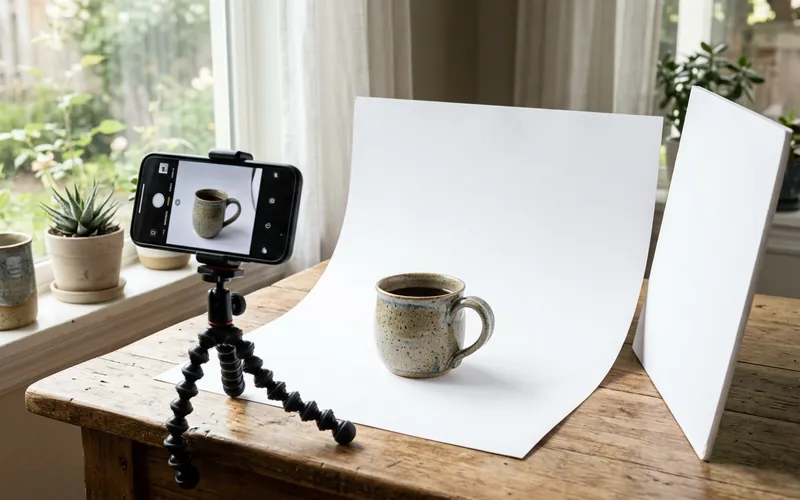
What you need
- A modern smartphone.
- A large window with indirect daylight (not harsh direct sun).
- White poster board or foam board for a background, curved up from the table to the wall to make a seamless "sweep."
- A second white board to bounce light into shadows.
- A small tripod or a stack of books to keep the phone steady.
- A soft cloth to clean the product and the phone lens.
Step 1: Set up near a window
Place your table beside the window so light comes from the side. Tape the poster board to the wall and let it curve down onto the table. Put the white bounce board on the other side of the product to soften shadows. Turn off room lights, because mixing light colors makes photos look yellow or blue.
Cloudy days are great for product photos: the light is soft and even.
Step 2: Keep the phone steady and level
- Use a tripod or books, and the phone timer, so photos are sharp.
- Wipe the lens. A fingerprint makes everything look hazy.
- Tap the screen on the product to focus, then slide the brightness slightly up or down.
- Avoid digital zoom. Move the phone closer instead.
Step 3: Take the shots every listing needs
| Shot | Why it helps |
|---|---|
| Front view on white | Clean main image for your shop and marketplaces |
| Back and sides | Shows the whole product |
| Close-up of details | Texture, stitching, materials, labels |
| Scale shot | In a hand or next to a common object, so buyers judge size |
| In use | Shows how it looks in real life |
| What is included | Everything in the package laid out |
| Any flaws | For used or handmade items, builds trust and prevents returns |
Shoot more than you need and pick the best later.
Step 4: Edit lightly
Use your phone's built-in editor or a free app:
- Crop so the product fills most of the frame.
- Straighten the horizon.
- Adjust brightness so the white background looks white, not grey.
- Keep colors true. Over-editing leads to "it looked different in the photo" returns.
Never edit out real flaws on a product you are selling.
Step 5: Size and save for your store
Big photo files slow down your shop. Most stores recommend square or near-square images large enough to zoom, often around 1,000 to 2,000 pixels on the longest side. Check your shopping cart's help pages for its recommended size, then compress images before uploading. Name files clearly, like "blue-ceramic-mug-front.jpg," and add alt text describing the product.
Marketplace and ad rules
If you sell on marketplaces or advertise products, check their image rules. For example, Google's product data guidelines ask for an accurate image of the product and do not allow promotional text or watermarks over the main image. Many marketplaces have similar rules.
Common mistakes
- Dark, yellow-tinted photos from indoor lighting.
- Busy backgrounds that hide the product.
- Only one photo.
- No sense of scale.
- Heavy filters that change the product's color.
Good photos work hand in hand with good descriptions. Next, read how to write product pages that sell, and if you sell downloads, see selling digital downloads for mockup ideas.
Frequently asked questions
Do I need a real camera for product photos?
No. A modern phone with good window light, a white background and a steady stand produces photos that work well for most online shops.
What is the best background for product photos?
A plain white or light neutral background works for main images. Add lifestyle photos in real settings as extra images.
How many photos should a product have?
Several: front, back or sides, close-ups, a scale shot, an in-use shot and what is included. Used items should also show any flaws.
Should I edit my product photos?
Lightly: crop, straighten and adjust brightness. Keep colors true and never hide real flaws.